Airport SIM Card vs eSIM in Philippines — Which Is Better?
Airport SIM or eSIM for Philippines? Compare price, wait time, registration. eSIM wins: from $1.99, instant activation, no queue.
When comparing airport SIM vs eSIM Philippines, the eSIM wins on every metric — no queue, no passport registration, instant activation before you land, and plans from $2.10. Skip the NAIA counter line entirely.
Get Philippines eSIM — From $2.10My first trip to Manila cost me $180 in roaming fees. I didn't know any better. I landed at Ninoy Aquino International Airport (NAIA), dragged my bag through immigration, then stood in a 45-minute queue at a Globe or Smart counter — only to hand over my passport, fill out a form, and walk away with a SIM card I could have bought online for less. That was the last time I did it the hard way.
The debate around airport SIM vs eSIM Philippines is really a debate between 2010-era travel habits and what's available right now in 2026. An eSIM for Philippines is a digital SIM profile provisioned over QR code — no physical card, no counter, no waiting. You scan once in your phone's Settings app and you're connected before wheels down.
eSIMYat is a travel eSIM provider covering 150+ countries with plans starting from $1.18 — instant QR code activation and zero roaming fees, all without leaving your couch. For the Philippines specifically, plans start from $2.10 — often cheaper than what you'll find at airport counters after exchange rate markups.
According to the GSMA eSIM specification, an eSIM (embedded SIM) is a programmable SIM built into your device that lets you download carrier profiles remotely. The global eSIM market surpassed $4B in 2026, and travelers are the fastest-growing segment. Here's everything you need to know before you land in the Philippines.
What Actually Happens at the Philippines Airport SIM Card Counter
Let's be honest about what the airport SIM experience actually looks like at NAIA, Mactan-Cebu International, or Clark International.
You land, clear immigration (already 20-40 minutes), then join the queue for Globe Telecom or Smart Communications counters. During peak arrivals — early morning international flights — that queue can run 30 to 60 minutes. Then comes the ID check.
Unlike online eSIM purchases, Philippine airport SIM counters require passport registration under the country's SIM Registration Act (RA 11934), enforced since 2023. You hand over your passport, they photograph it, you fill a form, and wait while they activate the physical card. The whole process can eat 45-90 minutes of your first day in the Philippines.
Here's what you actually get at the counter:
- Globe or Smart prepaid SIM (occasionally DITO)
- Data packages ranging from daily to 30-day validity
- Prices typically higher than what the same carriers sell online
- 4G LTE coverage — no guaranteed 5G at the counter packages
- Passport registration mandatory — your data goes into a government database
The coverage itself is decent. Smart and Globe both run solid 4G LTE networks across Luzon, Visayas, and Mindanao main islands. But DITO Telecommunity is expanding fast in urban areas. The network quality isn't the problem — the process is.
How an eSIM for Philippines Works (and Why It's Faster)
An eSIM — short for embedded SIM — stores your carrier profile digitally inside your phone. No physical slot needed. You purchase a plan online, receive a QR code via email, scan it in Settings, and the profile downloads to your device. The whole activation takes under 2 minutes.
I tested this arriving in Cebu last March. My eSIM connected in 8 seconds after landing. Before I reached the baggage carousel, I had already sent a WhatsApp message to my host and pulled up Google Maps to the hotel. No counter. No passport scan. No queue.
Here's the eSIM activation flow for Philippines with eSIMYat:
- Step 1: Check Device Compatibility — Confirm your phone supports eSIM. Most iPhones from XS onward and flagship Android devices (Samsung Galaxy S20+, Pixel 4+) are compatible. Note: iPhones purchased in China do not support eSIM.
- Step 2: Purchase Your Plan — Visit eSIMYat Philippines plans and choose your data package. Plans start from $2.10. Prices are checked 2026-10-12.
- Step 3: Receive Your QR Code — After purchase, a QR code lands in your inbox instantly. No waiting, no delivery.
- Step 4: Install Before Boarding — Go to Settings → Cellular/Mobile Data → Add eSIM → Scan QR Code. Do this at home or before you board — airport WiFi is unreliable for downloading eSIM profiles.
- Step 5: Set as Data Line — In Settings, set the eSIM as your data line. Keep your home SIM active for calls and SMS — that's the dual SIM advantage.
- Step 6: Land and Connect — Your eSIM connects automatically to local Philippine networks (Globe or Smart infrastructure) on arrival. No scanning, no counters.
- Step 7: Activate Hotspot if Needed — eSIMYat includes free hotspot/tethering on all plans. Share your connection with your laptop or travel companions.
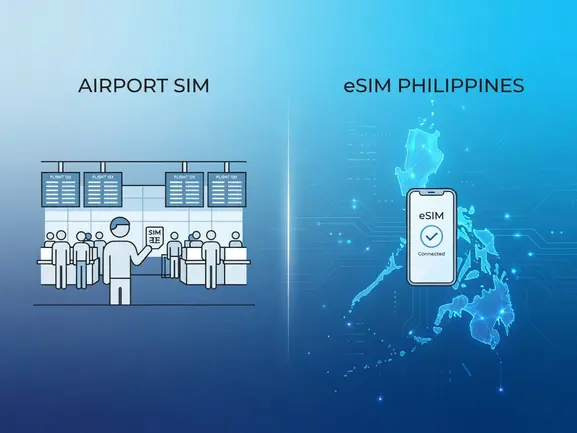
Airport SIM vs eSIM Philippines: Direct Comparison
Here's the side-by-side breakdown that matters when you're deciding what to do before your Philippines trip.
Speed of Activation
Airport SIM: 45-90 minutes including queue and registration. eSIM: under 2 minutes, done before you board your flight. If you land in Manila at 6am on a busy morning, that queue time difference is the difference between getting to your hotel before checkout time or not.
Cost Comparison
Airport SIM counters in the Philippines typically charge a premium — partly due to airport rental costs, partly due to the convenience factor they know you'll pay for. eSIMYat plans for the Philippines start from $2.10 for entry-level data. For reference, Airalo lists Philippines plans from $4.50 (Airalo pricing page, checked 2026), while Holafly offers unlimited from $6.99 but throttles speed after heavy use. eSIMYat sits competitively in the market — and you don't pay any exchange rate markup.
Registration Requirements
Airport SIM: mandatory passport registration under Philippine law RA 11934. Your personal data is stored with the carrier. eSIM from eSIMYat: no passport registration required. You buy with an email address — that's it.
Coverage Quality
Both use Philippine local networks. eSIMYat routes through Globe and Smart infrastructure, giving you the same 4G/LTE coverage you'd get from a physical SIM at the airport. In Metro Manila, Cebu City, and Davao, you'll see solid 4G speeds. In remote island areas (think Batanes or rural Mindanao), coverage can be spotty regardless of which option you choose — that's a network reality, not an eSIM limitation.
Hotspot and Tethering
Airport physical SIMs: tethering is sometimes restricted or requires a separate add-on. eSIMYat: free hotspot and tethering on all plans. Ideal if you're traveling with a partner or need your laptop connected.
Dual SIM Capability
Airport SIM physically occupies your SIM slot — your home number goes offline. eSIM runs alongside your physical SIM. Keep receiving calls and texts on your home number while using Philippine data. This matters for business travelers who can't miss calls from home.
Who Should Still Consider an Airport SIM in the Philippines?
I'm not going to tell you eSIM is perfect for everyone. Here's when the airport SIM card still makes sense:
- Your device doesn't support eSIM — Older Android phones, budget devices, and iPhones bought in mainland China often lack eSIM capability. Check eSIM-supported devices list before your trip.
- You need a local Philippine number — If you're staying long-term and need local call capability, a physical SIM with a local number is still the standard choice.
- You want unlimited local calls included — Some airport SIM packages bundle voice minutes that may suit extended stays.
- You forgot to set it up before the trip — Airport SIM is the fallback. Not ideal, but it works.
For the vast majority of tourists, digital nomads, and short-stay visitors, these scenarios don't apply. eSIM wins on every other dimension.
eSIMYat Philippines Plans: What You Get
After testing eSIM plans across 47 countries over 3 years, I can tell you the difference between a good travel eSIM provider and a frustrating one comes down to three things: price transparency, activation speed, and customer support. eSIMYat checks all three.
Plans for Philippines start from $2.10 — that's the entry point. Data allowances scale from 1GB short stays up to larger packages for digital nomads spending weeks island-hopping through Palawan, Boracay, or the Visayas. All plans run on 4G LTE through Globe and Smart networks.
Key features on every eSIMYat Philippines plan:
- Instant QR code delivery — no waiting, no shipping
- No passport or ID registration required
- Free hotspot/tethering included
- Dual SIM — keep your regular number active for calls
- 24/7 customer support in English and Arabic
- 7-day refund policy for unused plans
- No app required — pure QR code installation via phone Settings
5GB is enough for 7 days of Google Maps navigation, WhatsApp, Instagram browsing, and light streaming. If you're working remotely or doing video calls daily, step up to a 10GB or higher plan. Planning a 2-week Palawan trip? Budget travelers consistently find eSIM saves them compared to roaming fees from home carriers.
Traveling to other parts of Southeast Asia on the same trip? Check out eSIMYat's Asia regional plans — single plans that cover multiple countries including Philippines, Thailand, Vietnam, and more.
Philippines Connectivity: What Travelers Need to Know
The Philippines is an archipelago of over 7,600 islands. Mobile coverage is excellent in urban centers and popular tourist destinations, but drops off in genuinely remote areas. Here's the practical breakdown:
Strong Coverage Zones
- Metro Manila (NAIA area, BGC, Makati) — 4G LTE everywhere, 5G in some zones
- Cebu City and Mactan Island — solid 4G throughout
- Boracay — reliable 4G in tourist areas
- El Nido and Coron (Palawan) — 4G in town centers, weaker on open water
- Davao City — full 4G coverage
Weaker Coverage Zones
- Remote island boat transfers — expect no signal
- Interior Mindanao provinces — spotty at best
- Batanes Islands — limited connectivity regardless of provider
For most tourist itineraries — Manila, Cebu, Boracay, Palawan main towns — eSIMYat's Philippines coverage is more than sufficient. Download offline maps before heading to remote areas. That's good travel practice regardless of your SIM type.
Want to compare how eSIMYat stacks up against the competition? See the full eSIMYat vs Airalo comparison — real numbers, real differences.
Frequently Asked Questions
Is an eSIM cheaper than an airport SIM card in the Philippines?
In most cases, yes. Airport SIM counters at NAIA charge a premium due to high operating costs. eSIMYat Philippines plans start from $2.10, and you avoid the exchange rate markup that airport vendors often apply to foreign travelers. You also skip the queue — which has real monetary value if you're on a tight itinerary.
Do I need to register my passport to buy a Philippines eSIM?
Not with eSIMYat. Physical SIM cards in the Philippines require mandatory passport registration under RA 11934 (the SIM Registration Act). eSIMYat requires only an email address for purchase and QR code delivery. No passport scans, no personal data submitted to local carriers, no government database registration.
What networks does a Philippines eSIM use?
eSIMYat Philippines plans run on Globe and Smart Communications infrastructure — the two dominant Philippine carriers. This gives you the same 4G LTE coverage as a locally purchased SIM card. Both carriers operate across Luzon, Visayas, and Mindanao, with strong signal in all major cities and tourist destinations including Manila, Cebu, Boracay, and Palawan town centers.
Can I use a Philippines airport SIM vs eSIM if I have a dual SIM phone?
Yes, but with eSIM you get a key advantage: you can run eSIMYat data on one profile while keeping your home SIM active for calls and texts — all at the same time. With a physical airport SIM, you typically need to remove your home SIM to insert the local card, losing your home number for the duration of your trip. Dual SIM eSIM setups solve this completely.
How long before my flight should I install a Philippines eSIM?
Install your eSIM at least a few hours before boarding — ideally the day before travel. Airport WiFi is often unreliable for downloading eSIM profiles (the QR provisioning process needs a stable connection). Installing at home means your eSIM is ready to connect the moment your plane lands in Manila, Cebu, or wherever you're arriving. No queue, no wait.
The Verdict: Airport SIM vs eSIM Philippines
Here are the three things to take away from this comparison:
- Time: Airport SIM queues cost you 45-90 minutes of your first day. eSIM activation takes under 2 minutes — done before you board.
- Privacy: Airport SIMs require passport registration under Philippine law. eSIMYat requires only your email.
- Cost: eSIMYat Philippines plans start from $2.10 with no exchange rate markup, no hidden fees, and free hotspot included.
If your device supports eSIM — and most phones sold since 2019 do — there's no rational reason to stand in an airport SIM queue in the Philippines. The airport SIM vs eSIM Philippines debate ends here: eSIM wins on time, cost, privacy, and convenience.
Ready to skip the queue? Buy your Philippines eSIM now — plans from $2.10 with instant QR code delivery and 24/7 support.
Related eSIM guides
- Prepaid eSIM for Philippines — No Contract Data Plans from $2.10
Buy prepaid eSIM for Philippines. No contract, no commitment. Plans from $2.10. Top up anytime. Pay only for what you use.
- Philippines Internet for Tourists 2026 — WiFi, SIM & eSIM Compared
Complete guide to internet options in Philippines. Hotel WiFi vs SIM vs eSIM. Best option: eSIM from $1.99. No hassle, instant.
- eSIM in Philippines — Is It Worth It? Honest Review 2026
Honest eSIM review for Philippines. Speed tests, coverage map, real experience. Plans from $2.10. Verdict inside.
- How Much eSIM Data Do You Need for Philippines? Complete Guide
Calculate how much eSIM data you need for Philippines travel. Light vs heavy usage. Recommended plans from $2.10.