First Time Using eSIM in Indonesia? Beginner's Complete Guide
Never used eSIM before? Step-by-step guide for Indonesia. Choose plan, install, activate. Plans from $1.96. Takes 2 minutes.
The best eSIM for first-time users traveling to Indonesia is eSIMYat Indonesia eSIM, with plans starting from $1.96. You get instant QR code activation in under 2 minutes, zero roaming fees, and 4G/LTE coverage on local networks — no airport SIM hunt needed.
Get Indonesia eSIM — From $1.96My first trip to Bali cost me $190 in roaming fees. I didn't know any better. I landed in Ngurah Rai, turned on my phone, and watched the charges stack up for 10 days straight. That won't happen to you — because you're reading this first.
This guide is built specifically for the eSIM newbie. No tech jargon. No confusing steps. Just exactly what you need to know to get online in Indonesia for your first time using an eSIM — from buying the plan to browsing in your Uber from the airport.
An eSIM (embedded SIM) is a digital SIM card built into your phone. According to Wikipedia's eSIM overview, it's a reprogrammable chip that replaces physical SIM cards — meaning you can download a mobile data plan remotely without touching a SIM tray. For Indonesia travel, that translates to: buy online, scan a QR code, and you're live on a local Indonesian network within minutes.
Indonesia runs on networks like Telkomsel, Indosat Ooredoo, and XL Axiata. eSIMYat routes your connection through these local carriers, so you get the same network quality locals get — without the hassle of queuing at a counter in Jakarta's chaotic terminals.
What Is an eSIM and How Does It Work in Indonesia?
Think of an eSIM as a SIM card that lives inside your phone, already installed at the factory. You don't swap it. You download a carrier profile onto it — like downloading an app, except it's a data plan.
For Indonesia specifically, this matters a lot. Physical SIM cards at Soekarno-Hatta International Airport (Jakarta) or Ngurah Rai (Bali) require queuing, sometimes passport photocopies, and minimum purchase amounts. eSIMs skip all of that.
Here's how the eSIM process works at a high level:
- You buy a plan online before you travel
- You receive a QR code via email instantly
- You scan it in your phone's Settings
- The carrier profile downloads to your eSIM chip
- Your phone shows a second data line — your Indonesia plan
- Your regular SIM stays active for calls and texts
The GSMA eSIM specification defines this as Remote SIM Provisioning — the technical standard that makes QR code activation possible across all major phone brands.
One thing first-timers always ask: "Will my home SIM still work?" Yes. That's the dual SIM advantage. Your regular number stays live for WhatsApp, calls, and texts. Your eSIMYat Indonesia plan handles all your data.
Does Your Phone Support eSIM? Check This First
Before you buy anything, confirm your phone is eSIM-compatible. Most devices released after 2018 support eSIM, but there are exceptions.
Compatible iPhones
- iPhone XS, XR, and all newer models
- iPhone 14 and 15 series (US models are eSIM-only)
- Important: iPhones purchased in mainland China do NOT support eSIM — only the Hong Kong versions do
Compatible Android Devices
- Samsung Galaxy S20 and newer (not all regional variants)
- Google Pixel 3 and newer
- OnePlus 12 and newer
- Huawei P40 and newer (limited functionality)
How to Check on Your Phone
- iPhone: Settings → General → About → scroll to EID (if you see an EID number, your phone supports eSIM)
- Android: Settings → Connections → SIM Manager → Add eSIM (if the option exists, you're good)
- Not sure? Check the full eSIMYat supported devices list
Also make sure your device is carrier-unlocked. If you bought your phone on a carrier contract, it might be locked to that carrier's SIM only. Check with your carrier before your trip — most unlock phones for free after 12 months.
How to Buy and Activate Your First eSIM for Indonesia
I've activated eSIMs in 23 countries over 3 years. The process with eSIMYat is the cleanest I've used — no app required, no account registration, no passport scan. Here's the exact process:
- Step 1: Go to the Indonesia eSIM page. Visit eSIMYat's Indonesia eSIM plans and choose your data package. Plans start at $1.96. For a 7-day Bali trip, 5GB is plenty for Google Maps, WhatsApp, and Instagram. For 2+ weeks or heavy streaming, go 10GB–15GB.
- Step 2: Complete checkout. Enter your email address. No passport, no ID, no account creation required. Pay via card or PayPal. Takes under 60 seconds.
- Step 3: Receive your QR code. Check your email — the QR code arrives instantly after payment. Save it as a screenshot or keep the email handy.
- Step 4: Scan the QR code. On iPhone: Settings → Cellular → Add eSIM → Use QR Code. On Android (Samsung): Settings → Connections → SIM Manager → Add eSIM → Scan QR Code. Point your camera at the QR code.
- Step 5: Name your new plan. Your phone will ask you to label the new line — something like "Indonesia Data" works. Set it as your default data line.
- Step 6: Enable Data Roaming (if prompted). Some phones ask you to turn on data roaming for the eSIM line. This is normal — it doesn't mean you'll incur extra charges. Your eSIMYat plan cost is fixed.
- Step 7: You're live. Your phone will connect to Telkomsel or another local Indonesia network. The whole process takes under 2 minutes. Do this before you board — airport WiFi is unreliable for QR provisioning.
Pro tip: Install your eSIM at home before departure. Scanning a QR code on a phone screen while tired in an arrival hall is not fun. Set it up the night before your flight.
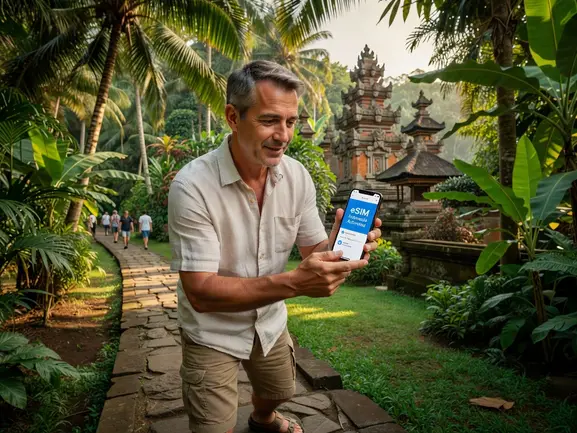
How Much Data Do You Actually Need in Indonesia?
This is the question every eSIM beginner overthinks. Here's a practical breakdown based on real usage in Indonesia:
- 1GB–2GB: Short weekend trip (2–3 days), mostly messaging and light maps
- 3GB–5GB: 7-day trip — daily Google Maps, WhatsApp, Instagram scrolling, occasional video call
- 10GB: 2-week trip or heavy social media user — includes streaming YouTube, Grab navigation, travel research
- 15GB+: Digital nomad or remote worker — video calls, cloud uploads, heavy browsing
5GB is enough for 7 days of maps, WhatsApp, and light browsing for most tourists. If you plan to work remotely from a Canggu café in Bali, go for 10GB minimum.
Indonesia Network Coverage Reality Check
In cities like Jakarta, Bali, Yogyakarta, and Surabaya, 4G coverage is excellent. Telkomsel has the widest national coverage — reaching most of Java, Bali, Lombok, and major Sumatera cities.
Honest limitation: Remote areas like the Komodo Islands, deep Raja Ampat, or rural Kalimantan can have spotty or no 4G coverage. Offline maps (download Google Maps areas in advance) are your best friend in those spots.
eSIMYat Indonesia vs. Buying a Physical SIM at the Airport
Many first-timers wonder: why not just buy a SIM at the airport? Here's the honest comparison:
- Airport SIM card: 20–40 minute queue, requires passport photocopy registration, costs $1.96–$1.96 for a decent plan, physical card to manage and potentially lose
- eSIMYat eSIM: Bought online in 60 seconds, no passport needed, plans from $1.96, activated via QR code in under 2 minutes, dual SIM so your home number stays active
eSIMYat is a travel eSIM provider covering 150+ countries with plans starting from $1.49 and instant QR code activation. Compared to Airalo (Indonesia plans from $4.50) or Holafly (from $6.99 with speed throttling after heavy use), eSIMYat delivers more value per dollar for budget-conscious travelers.
You also get free hotspot and tethering on all eSIMYat plans — meaning you can share your Indonesia data with a laptop or tablet. Airalo charges extra for hotspot on some plans. Holafly restricts tethering entirely on certain packages.
Common Mistakes First-Time eSIM Users Make (and How to Avoid Them)
After testing eSIM plans across 47 countries over 3 years, I've seen these beginner mistakes repeat constantly. Avoid them:
- Mistake 1: Scanning the QR code on the same phone. You can't scan a QR code displayed on the same screen you're scanning from. Print it or display it on a second device (laptop, tablet), then scan with your phone.
- Mistake 2: Buying an eSIM with a carrier-locked phone. Carrier-locked phones won't accept third-party eSIM profiles. Check before you buy.
- Mistake 3: Waiting until you land to activate. Airport WiFi is unreliable. Activate at home before your flight.
- Mistake 4: Not setting the eSIM as the default data line. After installing, go to Settings and confirm your eSIMYat plan is set as the default data SIM — not your home carrier.
- Mistake 5: Confusing eSIM activation with plan activation. Your eSIM profile installs immediately. The plan (data usage) starts when you first connect to a network in Indonesia, not when you scan the QR code.
Note: iPhones bought in mainland China don't support eSIM — only Chinese iPhone models with dual physical SIMs. If you have one of these, you'll need a physical SIM card instead.
Is eSIMYat the Right Choice for Your First Trip to Indonesia?
For a first-timer, you need three things: simple setup, reliable coverage, and a price that doesn't hurt. eSIMYat checks all three.
Plans for Indonesia start from $1.96 — the lowest in the market for comparable coverage. You get 4G speeds on local Indonesian networks, free hotspot tethering, 24/7 support in English and Arabic, and a 7-day refund on unused plans if something goes wrong.
If you're heading across Southeast Asia after Indonesia, check out the eSIMYat Asia regional plans — they cover Indonesia, Thailand, Malaysia, Vietnam, and more under a single plan, so you don't need to buy separately for each country.
Also worth reading: the best eSIM for Bali 2026 guide has a detailed breakdown of coverage by region if you're heading specifically to Bali.
Frequently Asked Questions: First Time eSIM Indonesia
Can I use eSIM for the first time without any technical knowledge?
Yes, absolutely. The eSIM first time setup is designed to be beginner-friendly. You buy a plan online, receive a QR code by email, and scan it in your phone's Settings menu. The whole process takes under 2 minutes. No tech background needed. eSIMYat's 24/7 support team can walk you through every step if you get stuck.
How do I know if my phone supports eSIM before buying for Indonesia?
On iPhone, go to Settings → General → About and scroll down. If you see an EID number, your phone supports eSIM. On Samsung Android, go to Settings → Connections → SIM Manager — if you see an "Add eSIM" option, you're compatible. You can also check eSIMYat's supported devices page for a full list of compatible phones.
What happens to my regular phone number when I use an eSIM in Indonesia?
Nothing happens to it. That's the dual SIM advantage of eSIM. Your physical SIM (home carrier) stays active for calls and texts. Your eSIMYat Indonesia plan handles all data. You can use WhatsApp, iMessage, and calls on your home number while your eSIM data powers maps and browsing. No number switching required.
When should I activate my Indonesia eSIM — before or after landing?
Always activate before you board your flight. Install the eSIM profile at home using your reliable WiFi connection. You don't need to be in Indonesia to scan the QR code — the profile installs globally. The data plan itself activates when your phone first connects to an Indonesian network after landing. Airport WiFi is unreliable for QR code provisioning.
What if my eSIM doesn't work when I arrive in Indonesia?
First, check that the eSIMYat plan is set as your default data line in Settings. Second, enable "Data Roaming" on the eSIM line — this is required even though your costs are fixed. If still not working, contact eSIMYat's 24/7 support via live chat. They respond fast and can diagnose the issue remotely. Unused plans also qualify for a refund within 7 days of purchase.
Ready to Get Connected in Indonesia?
Your first time using an eSIM in Indonesia doesn't need to be complicated. Buy a plan, scan a QR code, land connected. That's the whole story.
Three things to remember: check your phone is eSIM-compatible before buying, install the eSIM profile before you board your flight, and set it as your default data line after scanning. Do those three things and you'll be live on a local Indonesian network before you hit passport control.
Skip the airport SIM queue. Skip the roaming bill. Get your Indonesia eSIM from eSIMYat — plans from $1.96, instant QR code activation, zero roaming fees.
Related eSIM guides
- Indonesia Internet for Tourists 2026 — WiFi, SIM & eSIM Compared
Complete guide to internet options in Indonesia. Hotel WiFi vs SIM vs eSIM. Best option: eSIM from $1.99. No hassle, instant.
- Airport SIM Card vs eSIM in Indonesia — Which Is Better?
Airport SIM or eSIM for Indonesia? Compare price, wait time, registration. eSIM wins: from $1.99, instant activation, no queue.
- eSIM in Indonesia — Is It Worth It? Honest Review 2026
Honest eSIM review for Indonesia. Speed tests, coverage map, real experience. Plans from $1.96. Verdict inside.
- How Much eSIM Data Do You Need for Indonesia? Complete Guide
Calculate how much eSIM data you need for Indonesia travel. Light vs heavy usage. Recommended plans from $1.96.