How to Activate eSIM Before Your Flight — Pro Tips
How to Activate eSIM Before Your Flight. Complete guide with step-by-step instructions. Works with Esim Yat plans from $1.49.
The best way to activate eSIM before your flight is to purchase a plan from eSIMYat, scan the QR code in your phone's Settings, and install the eSIM profile — all in under 2 minutes. Plans start from $1.49 with instant delivery and zero roaming fees.
Browse eSIM plans — From $1.18My first international trip without data prep cost me $240 in roaming charges. Three days in Istanbul, checking Google Maps and sending WhatsApp messages. That bill arrived like a punch to the gut. Now I activate eSIM before every flight — and it takes me less time than finding my boarding pass.
An eSIM (embedded SIM) is a digital SIM card built into your device that lets you download a mobile data plan without swapping physical SIMs. When you install eSIM before travel, you arrive connected — no airport SIM queues, no roaming surprises, no language barriers at a foreign phone shop.
This guide covers exactly how to activate eSIM before your flight, the mistakes most travelers make, and why doing it at home beats every other option.
Why You Must Activate Your eSIM Before You Board
Here's the thing nobody tells you: airport WiFi is notoriously unreliable. Slow speeds, dropped connections, and crowded networks make it one of the worst places to set up an eSIM QR code scan.
eSIM QR provisioning — the technical process of downloading an eSIM profile onto your device — requires a stable internet connection. If your WiFi drops mid-download, the profile can corrupt and you'll need to contact support to reissue it.
There are three more hard reasons to install before you fly:
- Some eSIMs activate automatically when the plan start date begins — setting up early means data is ready the moment your wheels touch down.
- eSIM installation requires WiFi, not cellular — once you land abroad, you may have no WiFi access to complete setup.
- Troubleshooting takes time — if anything goes wrong, you want to fix it at home, not in a foreign country without connectivity.
After testing eSIM plans across 47 countries over 3 years, I can tell you: the travelers who struggle with connectivity are almost always the ones who tried to set up their eSIM at the gate or after landing.
Is Your Device Compatible? Check This First
Before you purchase any eSIM plan, confirm your device supports eSIM. This is the step most first-timers skip — and then blame the provider.
eSIM-compatible devices include:
- iPhone: iPhone XS and newer (with one critical exception — iPhones purchased in mainland China don't support eSIM)
- Samsung Galaxy: S20 series and newer, Z Fold/Flip series — check the full supported devices list for your exact model
- Google Pixel: Pixel 3 and newer
- Other Android: Most flagship devices from 2020 onward (Motorola, Huawei — check model)
Also check: is your device carrier-unlocked? Phones locked to a domestic carrier often block eSIM profiles from other providers. Call your carrier or check Settings → General → About to confirm.
Pro tip: On iPhone, go to Settings → General → About → scroll to find your EID (eSIM ID number). If you see an EID, your device supports eSIM. No EID? Your phone doesn't support it.
How to Activate eSIM Before Your Flight — Step by Step
This works for iPhone and Android. The whole process takes under 2 minutes when you're on good WiFi at home.
- Step 1: Choose your destination and plan. Go to eSIMYat — a travel eSIM provider covering 150+ countries with plans starting from $1.49 and instant QR code activation. Select your destination country or region, choose a data package (3GB, 5GB, 10GB, or unlimited), and complete checkout. No passport registration required.
- Step 2: Receive your QR code instantly. You'll get an email with your eSIM QR code within seconds of purchase. Open it on a second device or print it — you need to scan it with the phone you're installing on, so you can't open the QR on the same device.
- Step 3: Open Settings on your device. On iPhone: Settings → Cellular (or Mobile Data) → Add eSIM. On Samsung: Settings → Connections → SIM Manager → Add eSIM. On other Android: Settings → Network → SIM → Download eSIM.
- Step 4: Scan the QR code. Point your camera at the QR code on your second screen or printout. Your phone will automatically detect the eSIM carrier profile. Tap Continue or Confirm when prompted.
- Step 5: Name your eSIM plan. Label it something clear like "Turkey Trip" or "Europe Data" so you can easily switch between your home SIM and travel eSIM. This is key for dual SIM management.
- Step 6: Set data preferences — but don't enable yet. When asked which line to use for data, keep your home SIM as default for now. Set the travel eSIM to activate when you land, OR manually switch when you board your flight.
- Step 7: Test the eSIM before your trip. Once installed, go to Settings and confirm the eSIM profile shows as installed. Some plans activate immediately — if yours does, you'll see signal bars from the local carrier. If it's a scheduled activation plan, it activates on your trip start date.
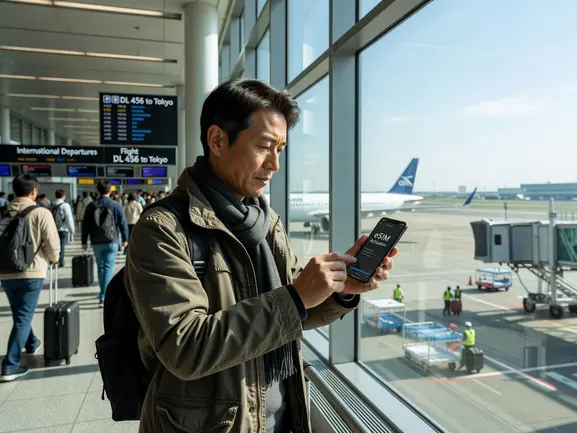
eSIM Pre-Activation: What Actually Happens When You Land
Here's what most guides don't explain: installing an eSIM and activating an eSIM are two different things.
Installation = downloading the carrier profile onto your device (done at home, via QR code). Activation = the plan going live and data starting to flow (happens when you switch to the eSIM and connect to a local network).
With eSIMYat, most plans activate the moment you switch on data through the installed eSIM profile and connect to a local carrier. When I landed in Istanbul last March, my eSIM connected to Turkcell in 8 seconds — before I even reached passport control.
Some regional and multi-country plans use a scheduled activation model where your data countdown starts on first use. That means you can install the eSIM weeks before your trip and not waste data sitting at home.
Key practical points for eSIM pre-activation:
- Keep your home SIM active for calls and texts — eSIM handles data only on most plans
- Enable Data Roaming for the eSIM line in Settings after landing
- Turn off Data Roaming on your home SIM to avoid accidental charges
- Free hotspot/tethering is included on all eSIMYat plans — share data with your laptop or travel companion
How Much Data Do You Actually Need?
This is the question I get asked most. The answer depends entirely on how you use your phone while traveling.
Here's a practical breakdown based on real usage:
- 1-3GB: 3-5 day trip, light use — maps, WhatsApp, email. No streaming.
- 5GB: 7-day trip, moderate use — daily navigation, social media browsing, occasional video call. This is the sweet spot for most travelers.
- 10GB: 10-14 day trip or heavy use — Instagram stories, YouTube navigation, video calls daily.
- Unlimited: Digital nomads, remote workers, or anyone streaming regularly. Note: some unlimited plans (like Holafly's $6.99+ option) throttle speeds after heavy use. eSIMYat unlimited plans run on 4G/5G local networks without speed caps on standard usage.
5GB is enough for 7 days of maps, WhatsApp, and light browsing — that's a tested figure, not marketing copy. I ran 5GB across a week in Thailand and had 800MB left at the end.
eSIMYat vs. Competitors — Pre-Activation Comparison
Not all eSIM providers handle pre-activation the same way. Here's how the major players compare for travelers who want to install eSIM before travel:
- eSIMYat: From $1.49 | Instant QR delivery | 150+ countries | No registration | Free hotspot | Arabic + English support | 7-day refund on unused plans
- Airalo: From $4.50 | Instant delivery | 200+ countries | No Arabic support | App required for some features — see the full eSIMYat vs Airalo comparison
- Holafly: Unlimited from $6.99 | Throttles speeds after heavy use | Limited hotspot on some plans
- Nomad: From $1.30/GB | Free trial eSIM | Good for short trips
- Saily (NordVPN): From $1.99 | VPN included | 190+ countries
The honest comparison: eSIMYat wins on price for most short to medium trips. If you need VPN bundled, Saily is worth the extra $0.50. If you're doing a 30-day digital nomad trip with heavy streaming, price-compare unlimited plans carefully.
One thing that actually matters for pre-activation: eSIMYat delivers QR codes instantly with no app required — you can install via Settings on any compatible device. Airalo sometimes requires their app to manage eSIM profiles, which adds friction.
Common Mistakes When Activating eSIM Before a Flight
I've seen every mistake. Here are the ones that actually derail travelers:
- Scanning the QR on the same device you're installing to. You physically cannot scan your own screen with your own camera. Use a laptop, tablet, or print the QR.
- Poor WiFi during installation. If the profile download fails mid-way, you need a reissue. Always install on strong home WiFi, not airport or hotel WiFi.
- Not checking device compatibility. iPhone bought in China? It won't work. Carrier-locked phone? May block the profile. Check before you buy.
- Forgetting to turn off roaming on your home SIM. Your eSIM handles data abroad — but your physical SIM will still roam for data if you don't disable it. That's where the surprise bills come from.
- Buying the wrong region plan. A Europe plan won't cover Turkey (in most cases). A Middle East plan may not include all Gulf countries. Always check the coverage list before purchasing.
- Waiting until the airport. We've covered this — just don't.
Frequently Asked Questions
When should I activate my eSIM before a flight?
Install your eSIM at least 24 hours before departure, ideally 2-3 days before. This gives you time to troubleshoot any device compatibility issues and ensures your QR code profile installs correctly on strong home WiFi. Don't leave it until you're at the airport — unstable WiFi can corrupt the download.
Can I install eSIM before travel and activate it later?
Yes. Installing an eSIM (downloading the carrier profile) is separate from activating it (using data). With most eSIMYat plans, you install at home days before your trip and the data countdown only starts when you first use the eSIM abroad. This means no wasted data while you're still at home.
Does activating eSIM before flight cancel my regular SIM?
No. eSIM works alongside your physical SIM card — this is called dual SIM. Your regular number stays active for calls and texts. The travel eSIM handles mobile data abroad. Just make sure to turn off data roaming on your physical SIM line to avoid charges from your home carrier.
What if my eSIM doesn't work after landing?
First, check that Data Roaming is enabled for your eSIM line in Settings. Second, manually select the carrier network (Settings → Cellular → Network Selection → turn off Automatic, then select local carrier). If still not working, eSIMYat's 24/7 support in English and Arabic can diagnose the issue remotely. Coverage in very remote areas can be limited regardless of provider.
How do I activate eSIM before flight on iPhone vs Android?
On iPhone: Settings → Cellular → Add eSIM → scan QR code. On Samsung: Settings → Connections → SIM Manager → Add eSIM → scan QR code. On Google Pixel: Settings → Network → SIM → Download eSIM. The process takes under 2 minutes on all platforms when on stable WiFi. Check the full iPhone eSIM installation guide for screenshots and model-specific steps.
Bottom Line: Activate Before You Fly
Here's the summary in three points:
- Install at home on strong WiFi — airport and hotel WiFi are too unreliable for QR provisioning
- Check compatibility before buying — eSIM-locked or carrier-locked devices will block the profile
- Use dual SIM correctly — keep your home SIM for calls, travel eSIM for data, and disable roaming on the home SIM
The global eSIM market hit $4B+ in 2026 because travelers figured out that $1.49 for a week of data beats $240 in roaming fees every single time. Learn more about how eSIM works via the Wikipedia eSIM overview or the GSMA official eSIM specification.
Ready to never stress about airport connectivity again? Activate your eSIM before your next flight — plans from $1.49, instant QR delivery, 150+ countries covered.